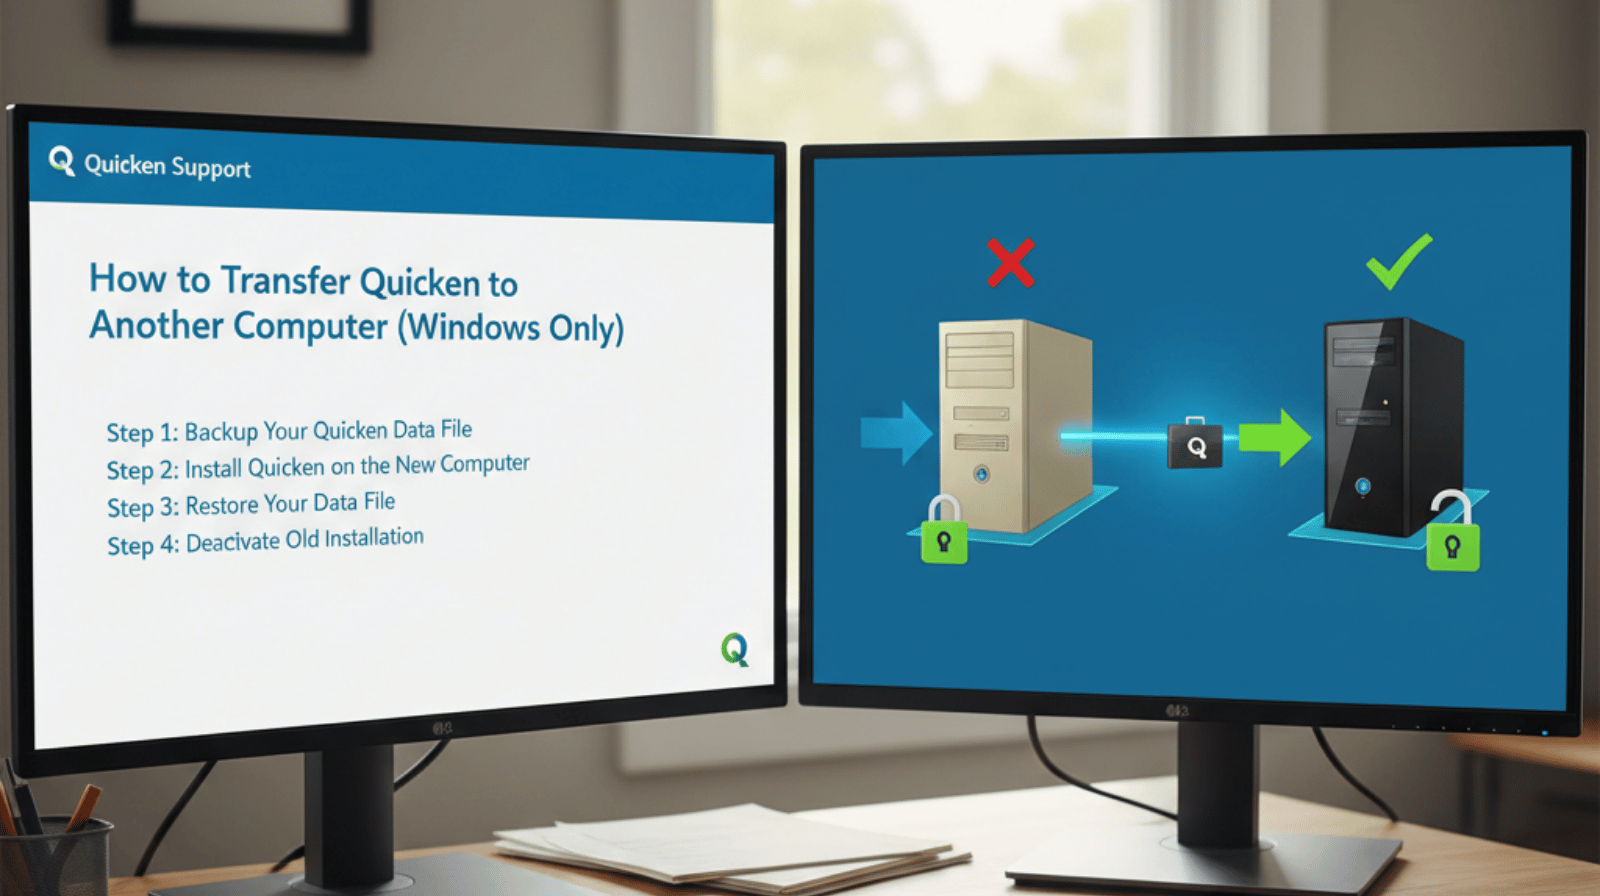
Are you upgrading your PC and wondering how to transfer Quicken to another computer? Don’t worry—moving Quicken along with all your financial data to a new Windows device is simple when you follow the right steps.
In this guide, we’ll show you exactly how to transfer Quicken from one computer to another on Windows without losing any data.
Why Move Quicken to a New Computer?
Users have various reasons to move Quicken to a new PC, but the most common reasons are
- You bought a new Windows PC.
- Your old device is sluggish, corrupt, or dying.
- You desire a backup of Quicken on an additional machine.
- You’re moving to a new workstation, and you want to have access to your files in My Financial Data.
How to Transfer Quicken to Another Computer (Windows)
Sign Out of Quicken on the Old Computer Start by signing out of your Quicken account on the old computer.
Open Quicken on your old PC.
- Visit Edit > Preferences > Quicken ID & Cloud Accounts.
- Click Sign Out.
- (This step is intended to prevent sync problems when you log into the new computer.)
To create a backup of your Quicken data file (.QDF)
All your financial history is stored in the Quicken Data File (.QDF). You must have this backup to move Quicken.
- For Quicken, click on File > Backup and Restore > Backup Quicken File.
- You can keep the backup file on a USB stick, external hard drive, cloud storage (Google Drive, OneDrive, Dropbox), etc.
- Make sure the file is saved correctly before proceeding.
Install Quicken on the new PC/device.
Open a browser on your new Windows computer—say, Chrome—and direct it to the official Quicken website (www.quicken.com).
- Log in with your Quicken ID.
- Get the newest Quicken from Intuit.
- Follow on-screen directives in order to install the application.
Copy Your Quicken Data File to Your New Computer
- Open Quicken on your new computer.
- Go to File > Backup and Restore > Restore from Backup File.
- Locate your saved file. backup file you have saved on a USB device or in the cloud.
- Click Restore and confirm.
Now your money history would work also on the new device as it was.
Tips for a Smooth Transfer
- Maintain two standby copies of your data before transferring.
- Ensure both computers have the same version of Quicken.
- If you’re running older versions of Quicken, you may need to restore your file format while restoring.
- If you keep a current subscription, it’s as easy as can be to install.
Read:-Quicken Investment Sync Errors: CC-800 and OL-295-A
Frequently Asked Questions